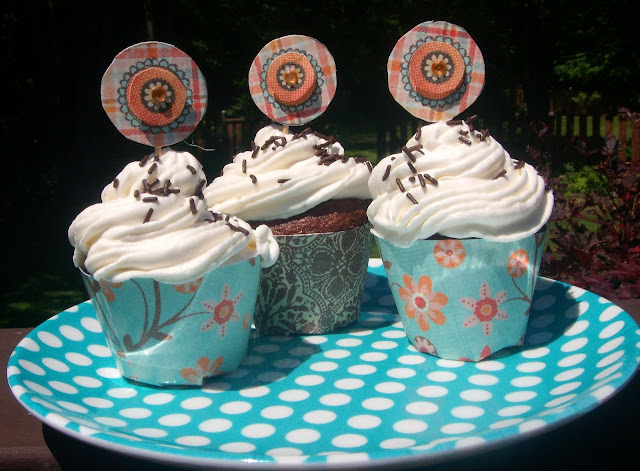

I have had some people post on their blog that the cupcake wrappers are too large for their cupcakes. This made me realize that I need to show you how to use them. If you would like to try to use them, go to the "
Cupcake Printables" tab under the header on my blog, pick one and click on the link. It will take you to the post.
Internet Explorer Users:
This is important! Click on the sheet that you would like to use and it should open into a larger screen.
Next right click on the picture and choose "print picture" {or you can choose "save picture as" and save it to your hard drive. This will let you open it into any photo editing software you have} and print it on white cardstock. These are all created in Letter size (8 1/2 x 11), and some of them are landscape rather than portrait so you may have to adjust your printer set-up. To find another size paper in Internet Explorer, choose "General" tab, "Layout" button and then "Advanced" button from the print pop-up. IE is the only browser I use, so you may have to play around with it if you use Firefox, etc. Sorry!
Google Chrome Users:
Click on the picture you want to use. It will open into another screen, but you do not get the choice to print the picture from your "right-click" menu. Instead, you have to choose, "Save Image As" and save it to your desk top. From there, you can open the file into any photo browsing software you have and print is from that program.
Ok... next....
Cut out the elements you'd like to use. This particular wrapper comes with paper "lollipops" which go into the top of the cupcake.
Here is what you will need to make the paper lollipops.
Toothpicks (any kind will work as will skewers)
Tape
The rest is optional....
3D foam pop-dot (I use the white roll in the picture. It is usually used in matting for pictures)
A 2-inch hole punch (will make it easier to get nice round circles)
Glue (optional)
Crystals or brads (optional)
First, I baked the cupcakes in the Wilton silicone cupcake "papers" and removed them after they were cooled. Don't forget to spray the silicone or the cupcakes will stick. Learned this the hard way! You can also bake them in paper liners and keep them in the liners. Let your cupcakes cool while you are printing and cutting these out.
Once they are cut out, place pop-dots or foam tape onto the center of the lollipop backgrounds.
Place a dot of glue in the middle of the flowers if you are using crystals. (Try not to make a mess like I did!)
If you do make a mess with the glue, don't worry about it as it will dry clear.
Next, remove the paper from the foam glue/pop-dots.
Place the crystals in the middle of the glue. And place these middles onto the pop-dots.
So they look like this. Don't worry if your circle aren't prefect. You want people to realize that they are homemade. If you are more discerning that I am, you can use a paper punch to punch them out perfectly!
After the glue dries a bit, you can flip these over and tape the toothpick to the back of the circle. Now you have a lollipop for the top of your cupcakes.
Now onto the cupcake wrappers themselves....
First you have to have your cooled cupcakes which you baked in cupcake papers. Do not bake your cupcakes in these wrappers! If you have large cupcake pans (6 to a pan), the cupcake wrappers will fit as they are. Just cut them out, tape the edges and plop your cupcake into them. If, however, you are making normal, standard-sized cupcakes, you will need to do some adjusting to the wrappers.
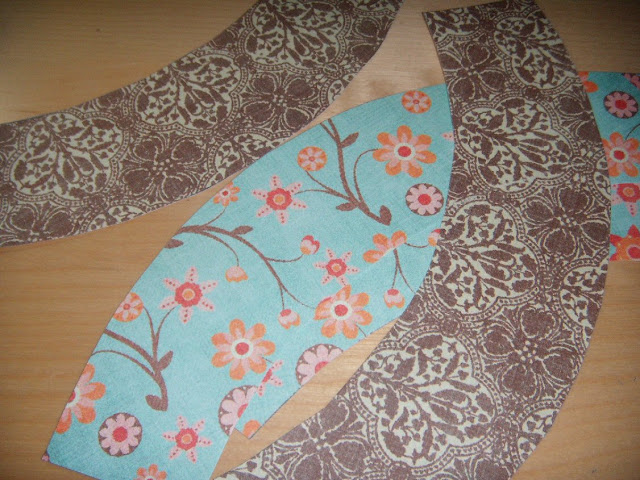
Next, print out and cut out your wrappers from
here. They should look like this.
Measure your cupcake to the wrapper so you can tell about how round it should be.
Cut the extra from the ends of the wrapper or you will have a lot of overlap. That is fine too, but I prefer it with less overlap. (See the end pieces I cut off?)
Have a piece of tape ready and neary by. Re-wrap the cupcake and tape it on the outside. If I don't cut those ends off and I have a lot of overlap, I sometimes put a piece of tape on the inside too.
Here it is with tape on it.
Now look under the wrapper. If you are keeping your cupcakes at home, you can leave them this high. They are a little more tipsy this way, but I think they look more elegant and more of the design shows.
If you are taking them somewhere, you will need to do the following steps.
Cut 1/2 to 3/4 inch slits up the bottom. The closer you make the slits, the more round your bottom will turn out. I'd say you should make 8-10 slits all around the bottom.
Next, fold the flaps toward the inside. This will create a bottom to your wrapper. You are looking at the bottom in this photo.
Now insert your cupcake and get ready to add some frosting.
Here is the frosting recipe I use for my cupakes. It is so yummy and so fluffy. I use a Wilton #1E tip to frost my cupcakes. You will see that I didn't measure my cupcake wrappers very well in the photo below. I wanted to show you that it doesn't matter. You can fill them with MORE icing this way!
Start at an outside edge and squeeze some icing around the edge of the cupcake.
Pipe around and around until you get to the center! And you are done and can add sprinkles and a lollipop topper!
Eat up and enjoy!!!
I posted this at....


.jpg)


