Sunday, January 30, 2011

"No Pancakes Today, I'm Afraid!"

I love this quote by Parker Posey in "The House of Yes"....totally making fun of Pennsylvania where I am originally from. 

My kids love pancakes.  I don't really get it.  I think it is more about the syrup than the pancakes.  Pancakes offer very little nutritional value, so I've found a recipe made with whole wheat that I like.  They like it, but not as much as those fluffy buttermilk ones they get at, say, IHOP.  I've discovered that adding mini-chocolate chips or M&M's to the whole wheat ones make them disappear very quickly.  This morning they wanted pancakes but I had no chocolate to add to them.  What was I to say?  "No pancakes today, I'm afraid?"

Noooo.... I found that we had THESE in the cupboard.

So I added the marshmallows to the pancakes and they went down very well, thank you very much, Swiss Miss....  Here's the pancake served upside-down so the colors show.  Looks like a party on the plate, don't you think?


Here's my favorite recipe for whole wheat pancakes.

For pancakes (yields 2-4 pancakes)
  • 1 1/4 cups whole-wheat flour
  • 1/3 cup cornmeal
  • 6 tablespoons buttermilk
  • 1 tablespoon sugar
  • 2 teaspoons baking powder
  • 3/4 teaspoon baking soda
  • 3/4 teaspoon salt
  • 1 1/4 cups water
  • 2 large eggs
  • 1/4 cup vegetable oil
  • butter for oiling the pan
Whisk together dry ingredients in a bowl, then add water, eggs, and oil and whisk until smooth. Let stand 5 minutes (batter will thicken). If batter is too thick to pour easily (whole-wheat flours vary in how much liquid they absorb), thin with additional water, 1 tablespoon at a time.
 
Brush a griddle or 12-inch skillet with butter and heat over medium heat until hot but not smoking. Reduce heat to medium-low. Pour 1/4 cup of batter into hot pan to form one large pancake. Cook until bubbles appear on surface and pop, edges are set, and undersides are golden, 45 seconds to 1 minute. Flip pancakes with a spatula and cook until undersides are golden and pancakes are cooked through, 45 seconds to 1 minute more. (Lower heat if pancakes brown too much before insides are cooked through.) Transfer pancakes to plates and brush griddle with butter between batches. Serve with syrup.

Happy Morning!
  • Photobucket

Saturday, January 15, 2011

How To Make Thai Spring Rolls

When I lived in San Diego, I found the tastiest treat EVER at Saffron on India Street.  I fell in love with this low-cal, low-carb treat.... really, a hand-held salad.  It was heaven.  I had my husband pick them up about once a week on his way home from work. 

Eventually, I moved to Upstate NY and could no longer get these yummy lunches/dinners, so I learned to make them myself.  It really is easy if you can find the spring roll wrappers at your grocery store.  I've found these at Wegman's in NY and hopefully you can find them at yours too.

These are the ingredients you need:

Spring Roll Wrappers

Roast Chicken breast sliced - Great from leftover roast chicken or you can buy a roast chicken at the grocery; Large leaf lettuce (mine is red leaf), cucumber sliced the long way, cilantro, peanuts (chopped or not)... I also sometimes add thin carrot sticks to the mix. Some people like fresh mint leaves in theirs too, but I'm not a fan.  I have also seen them made with cooked shrimp instead of the chicken.


Optional... but oh so good... a peanut sauce and a Thai Sweet Chili Sauce.  These are my favorite brands...
You can actually find them at our Walmart, but not sure about yours.

To assemble:

Take one of the Spring roll wrappers from the package.  They are hard and feel a little like plastic.

In a large frying pan, heat about a cup of water to simmering.  Turn off the heat.
Have a pair of tongs ready.


Put the wrapper into the water.  It will roll a bit, but use your tongs to keep it down
a bit.  Just after you get it wet, flip it over carefully.


Get the entire other side wet.  You don't want to keep it in too long or it will get too soggy and rip
easily.


Remove from the pan to your work surface.  Try to keep it from doing this!
In order to do so, while you pick it up with the tongs, grab the other side with
your fingers.  It will be hot, so be careful.   If it does turn out like this, throw it
out and start over.  I guarantee one will do this.


This is what it should look like. 
 Add one leaf of lettuce in the top middle.
 Cilantro on top of that....
 Cucumbers on top of that...
Chicken pieces on top of that...
 Peanuts on top of that.  I like mine whole, but you can chop them if you like them less chunky...

I add the peanut and chili sauces right inside so I don't have to dirty a dish to dip in, but you can dip them if you like!


Next, fold the bottom half of the wrapper up over the filling....
Fold the left side over the fillings and roll it all up to the right side.
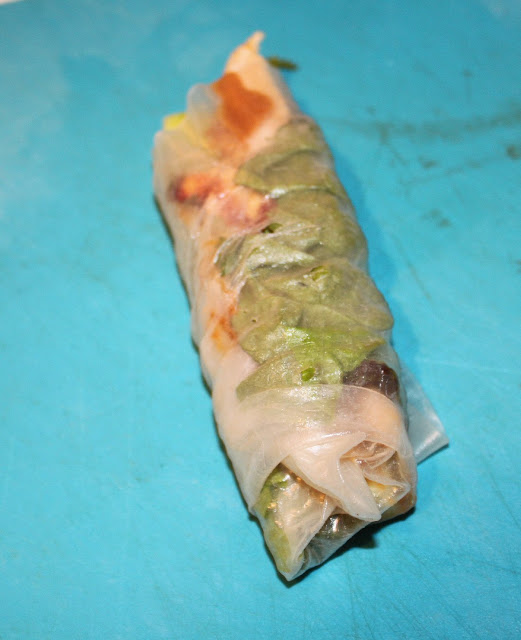
 In the end it will look like this...


I generally eat 4 of them for a meal.  Hope you enjoy this tutorial and love these as much as I do!

If you can't find the wrappers at your store, you can order them online at Amazon... Same goes for the sauces... but they only hvae a 6 pack of peanut sauce on there.  I'm sure you can find the single bottle online somewhere....

Spring roll wrappers (rice paper)- 12 oz Spring roll wrappers (rice paper)- 12 oz
 House of Tsang Bangkok Peanut Sauce, 11.5-Ounce Bottles (Pack of 6) House of Tsang Bangkok Peanut Sauce, 11.5-Ounce Bottles (Pack of 6)

Sweet Chili Sauce - 25 oz Sweet Chili Sauce - 25 oz


Photobucket

Sunday, January 2, 2011

Valentine's Day Freebie Cupcake Wrappers

I usually don't do two posts in a day, but I wanted to get these on my blog so you have a chance to grab them up before the holiday hits... rather than as I usually post them a few days before the holiday.  Please enjoy!  Directions for using them can be found here as well as a whole list of freebies which can be found here.

This type of cupcake wrapper works best on larger cupcakes, but you can cut the ends off of the wrapper and make it smaller so it will fit a normal-sized cupcake.


This kind of wrapper works best on normal-sized (12 cupcakes to a pan) cupcakes.  Just print, cut out and tape the ends together. 

I posted this on Made By You Monday at


and


'
and


Fine Craft Guild


and I was featured on


oneprettything


Photobucket

How To Make Glitter Lollipops - Revisited

One of my most popular posts on my crafty blog was this quick tutorial showing how to make glittered lollipops.  I don't know why I never showed it on my food blog???  So, I just reposted it here for my foodie friends to see.  Hope your New Year is SWEET!

I made some glitter pops today. I had this mold that I haven't used and wanted to play with chocolate. I bought mine at a cake supply store about a year ago.

These pretty pops are flavored with creme de mint.

Here is what you need:
Wilton Lollipop Mold
Wilton Lollipop Sticks
Wilton Candy Melts
Food Coloring
Creme de Menthe Flavor Oil (I get this at one of my local pharmacies)
Sanding Sugar (Found with cake supplies and toppings)

1) Add a tiny dab of shortening to a small microwavable bowl wiht about 15 of those little white chocolate disks that you can get at Michaels or WalMart and melt them in the microwave for about 20 seconds. I used about 15 per lollipop.

2) Stir (you may need to melt a little more) then add some food coloring and a few drops of mint flavored oil and stir again.

3) Fill the three molds and put the sticks in them and twist the sticks so they get coated with chocolate

4) Put them in the refrigerator for about an hour. Pop the out of the molds.

5) After I unmolded them, I stuck them under the hot broiler element in my oven for about 5 seconds and dipped them in sanding sugar. You are DONE! Easy Peasy.

They are so glittery and pretty! What kid wouldn't want to eat those? Heck, what adult wouldn't?


If you need to get the candy melts, you can get them here.  I couldn't find any blue ones, but they would look super cute in pink too... and they would be cheaper t!  I used white and colored them with neon food coloring.  The link is below if you would like to get them...

And here is the neon food coloring which created this pretty blue...


Sanding Sugar...

I really have to get the heart lollipop molds to try this with for Valentine's Day. The round one would be cute too, but I couldn't find the swirly one that I used.  I think I found that one years ago at a cake supply store.

Also, if you need lollipop sticks, you can find them here...


And bags to put them in....


Please show me your product if you make these! I'd love to see them!
Tami
Photobucket


Blog Widget by LinkWithin